
Click HERE to watch this class free for a limited time, thanks to our partnership with PPA, the world’s largest nonprofit trade association for professional photographers.
About This Class
In this second-part class on light modifiers, Phillip Blume walks us through how to incorporate additional light sources on a model in his studio set-up. For review, Watch Part 1 HERE.
Visit The Blumes Education Site now to sign up for more tips + tricks and helpful resources to grow your photography business.
“I don’t get it!” I complained. “How does she get every photo to look… so freakin’ good?” Eileen listened patiently as I voiced my frustration and enviously scrolled through another photographer’s recent blog post. Even though this “competitor” was just a newbie, too, somehow her images looked like something out of a fashion magazine.
I was so jealous.
We had begun our wedding photography business that same year, and our our calendar was booked full! So you might ask, Why wasn’t I happy? Here’s the thing: I was scared to death!
Our website was full of “lucky shots” we’d captured under perfect natural-light conditions. But I had no idea how to re-create those results consistently.
Our photo portfolio at the time represented only our very best work. Translation? Our website was full of “lucky shots” we’d captured under perfect natural-light conditions. But I had no idea how to re-create those results consistently. (Yikes!!!)
Instead of job security, suddenly the year ahead felt more like 20 major client disappointments waiting to happen. What could we do?!
So I did the thing that scared me almost as much as angry clients — I decided to buy a flash right away, and commit to learn it inside and out!
By the end of the week, I had my new flash mounted to a stand with a simple umbrella and wireless trigger. It was all set up in our bedroom after buying a mattress topper; so I called Eileen in to join me on the bed for a test shoot. (Side note: After proof-reading this blog post, Eileen has asked me to clarify that it wasn’t that kind of photo shoot.. LOL) Actually we just sat on the edge of the mattress and pressed the trigger button. Then…
We hurried over to the tripod to check the results on the camera. And our. jaws. dropped. We had never photographed something that looked so… dimensional, professional, commercial (and honestly a little sketchy) before!
Do you want to see exactly how I lit that first shot.. and almost every shot in our 12-year career since?!?!
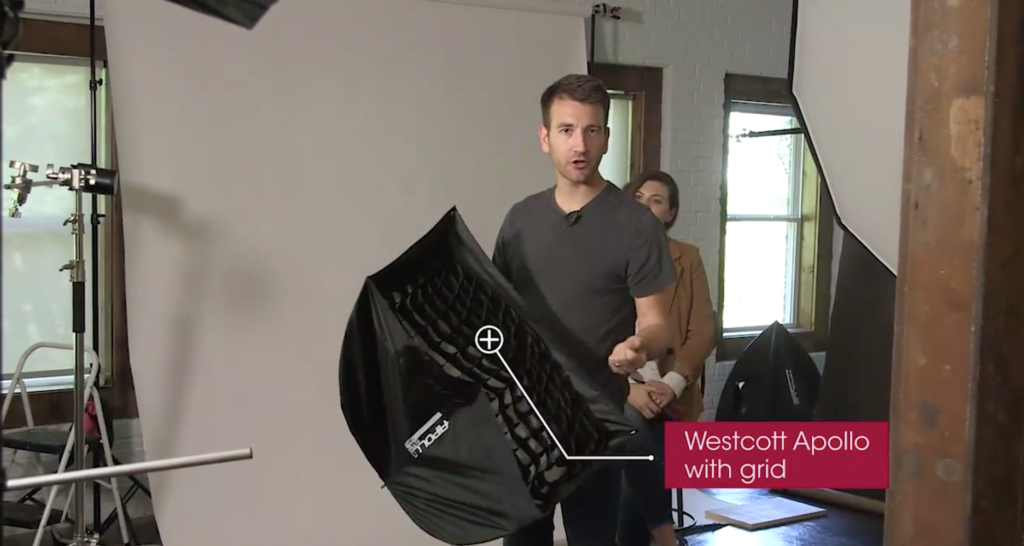
Today in the Lighting Modifiers: Part 2, I’m showing you how to add more lights to your setup. You can do this anywhere, and it will help you create that dimensional, commercial look your clients will rave about!
Watch above to see —
- My go-to, 2-light and 3-light setups
- Why I prefer umbrella-style soft boxes instead of speedrings
- Why I “tell on myself” when I make mistakes in front of clients
- Where I always position my lower-power flashes
To See The Tools We Use In This Video And More, View our Camera Bag and Studio Kit HERE!
In Unity,


Be the first to comment